
Use the JavaScript SDK with cross-platform apps
A tutorial for adding the JavaScript SDK code to your app to allow your app users to receive push notifications from your Dotdigital account
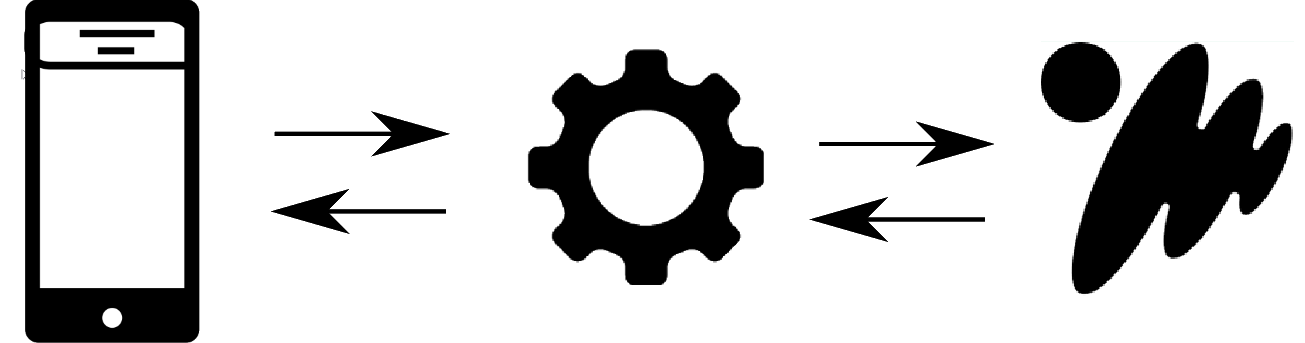
The JavaScript SDK is for cross-platform apps. It works differently from our native SDKs, because it runs inside a JavaScript framework and reaches the device APIs through that framework rather than directly.
This means your app must do two things that the native SDKs do for you:
- Get the native device push token, which the SDK calls the registration ID. Use your framework's push plugin to do this, then pass the token to the JavaScript SDK.
- Open any deep link that arrives with a push message. The JavaScript SDK reports the tap for you, but it does not open the link.
To set up push notifications for cross-platform apps, complete the following tasks:
- Install the JavaScript SDK
- Configure the JavaScript SDK
- Initialise the JavaScript SDK
- Ask permission to send notifications
- Register the push token for the app
- Create an Android notification channel
- Handle push notifications
- Handle deep links and link tracking
- Optional: Handle silent and background data pushes
Your app needs a native wrapper, because this SDK does not support web pushThe JavaScript SDK sends push notifications through Apple's APNS and Google's FCM. Both services need a native device token, so your JavaScript code must run somewhere that can reach the native push APIs.
This works when your web app runs inside a native wrapper that provides a JavaScript-to-native bridge and a push plugin, such as Cordova, Capacitor, or React Native. A progressive web app (PWA) packaged this way gets a native device token in the same way any other cross-platform app does, so push notifications work normally.
This does not work when your web app runs in a browser, or when it is installed to the home screen and still runs in the browser engine. In those cases there is no native push plugin, so there is no native token to send us. Dotdigital Marketing does not support browser web push, which uses a service worker and the Web Push protocol instead of APNS or FCM tokens.
Check that your wrapper exposes a native push pluginNot every native wrapper gives your JavaScript access to the native push APIs. An Android Trusted Web Activity (TWA), for example, runs your site in the browser engine, so its notifications use web push rather than an FCM token that your JavaScript can read.
Before you start, confirm that your wrapper has a push plugin that returns a native APNS or FCM device token. If it returns a web push subscription instead, you cannot use it with this SDK.
How this SDK differs from the native SDKs
Task Native Android and iOS SDKs JavaScript SDK Ask the user for permission The SDK guide shows you the platform code Your framework's push plugin asks for it Get the device push token The SDK collects it Your framework's push plugin collects it, then you pass it to the SDK Detect the platform Not needed You must detect it, because iOS and Android use different SDK methods Create an Android notification channel Not needed for the default channel Your framework's push plugin creates it Report a push tap The SDK reports it The SDK reports it, but only when you pass the message to it Open a deep link The SDK opens it Your app or a Cordova plugin opens it Display a foreground notification You build it Your framework's push plugin can build it, or you build it
Sample code
This tutorial shows each code sample in two forms: ES6 for projects that use modules, and Classical for projects that use the global COMAPI object. Use the form that matches your project. A full TypeScript sample is in the JavaScript SDK sample code in TypeScript section.
More sample apps are available below. These are basic examples of one way to integrate the JavaScript SDK. They are not production-ready solutions:
Install the JavaScript SDK
Install the JavaScript SDK from NPM:
npm install @comapi/sdk-js-foundation --save
ES6 PromisesThis SDK uses ES6 Promises, which have wide support in web containers and browsers. Depending on the browsers that you target, you may need a polyfill such as es6-shim.
If your project uses ES6 modules
Most projects use ES6 modules, for example projects built with Angular, Ionic, or React Native. Import the Foundation, ComapiConfig, and IAuthChallengeOptions modules:
import { Foundation, ComapiConfig, IAuthChallengeOptions } from "@comapi/sdk-js-foundation";The NPM package is written in TypeScript and ships its own type definitions, so the ES6 examples in this guide are in TypeScript.
If your project uses classical JavaScript
If you do not use a module bundler, and you want a script that exposes a global object on your page, use the pre-built bundle in the package. Copy comapi-foundation.js or comapi-foundation.min.js from the dist folder of the installed package into the folder that your app serves scripts from, then include it:
<!-- Full version -->
<script src="scripts/comapi-foundation.js"></script>

<!-- Minified version -->
<script src="scripts/comapi-foundation.min.js"></script>
The bundle exposes a single COMAPI global object. The classical examples in this guide use it.
Safe list the API calls that the SDK makes
Cordova based apps restrict the URIs that the app pages can access. You must safe list the URIs that the SDK uses, so that the SDK can operate.
If you use cordova-plugin-whitelist, add this line to the config.xml file in your project:
<allow-navigation href="https://*.comapi.com/*" />If you use Content-Security-Policy tags, include this directive:
connect-src https://api.comapi.com:*For example:
<meta http-equiv="Content-Security-Policy" content="default-src 'self' data: gap: https://ssl.gstatic.com 'unsafe-eval'; style-src 'self' 'unsafe-inline'; media-src *; img-src 'self' data: content:;connect-src https://api.comapi.com:*">Configure the JavaScript SDK
Before you configure the JavaScript SDK, you need:
- The value of the API space ID field in Dotdigital Marketing.
- A function that creates a JWT.
- Create a
ComapiConfigobject:
var comapiConfig = new COMAPI.ComapiConfig();- Pass your API space ID to the
withApiSpace()method:
var comapiConfig = new COMAPI.ComapiConfig()
.withApiSpace(appConfig.apiSpaceId);- Pass the function that creates a JWT to the
withAuthChallenge()method:
var comapiConfig = new COMAPI.ComapiConfig()
    .withApiSpace(appConfig.apiSpaceId)
    .withAuthChallenge(challengeHandler);
Setting the log level
Use withLogLevel() to control how much the SDK logs. The available levels are LogLevels.None, LogLevels.Error, LogLevels.Warn, and LogLevels.Debug.
var comapiConfig = new COMAPI.ComapiConfig()
    .withApiSpace(appConfig.apiSpaceId)
    .withAuthChallenge(challengeHandler)
    .withLogLevel(COMAPI.LogLevels.Warn);
Privacy noteDebug logs can include request and response detail. Do not ship a release build at
Debuglevel.
Initialise the JavaScript SDK
After you configure the SDK, pass the comapiConfig object to the initialise() method.
This method creates a valid session. It calls your JWT function, then uses the JWT to create the user's profile ID, which is a profileId string.
When you stop a session and start it again, the SDK requests a new JWT and uses it to create a new profile ID.
The SDK creates a new session when you call initialise() in these cases:
- The user uninstalls the app, then reinstalls it.
- The user clears all of the app's data.
- You call the
endSession()method. Call this method only when you want to stop the app receiving push notifications, or when you want to change the app user.
Your app needs a valid session before it can add an email address or a push token to the user's profile.
COMAPI.Foundation.initialise(comapiConfig)
    .then(function (sdk) {
        console.log("Foundation interface created", sdk);
    })
    .catch(function (error) {
        console.error("Failed to initialise", error);
    });
initialise() and initialiseShared()
Foundation.initialise()returns the SDK instance, and you store it yourself.Foundation.initialiseShared()also stores the instance inside the SDK, so that you can retrieve it elsewhere in your app. Both methods return a Promise.
Next, get a native device push token and pass it to the SDK. The next section covers this.
Ask permission to send notifications
App users must give permission before your app can display push notifications. The requirement is different on each platform, and your framework's push plugin asks for it.
| Platform | Requirement |
|---|---|
| iOS, all versions | The user must accept a permission prompt. |
| Android 12 and earlier | No runtime permission is needed. |
| Android 13 and later (API 33) | The user must grant the POST_NOTIFICATIONS runtime permission. |
Android 13 drops every notification without the runtime permissionOn Android 13 and later, the operating system discards every notification if the user has not granted
POST_NOTIFICATIONS. It reports no error to your app.Your token registration still succeeds, and your contact still appears in Dotdigital Marketing, so this problem looks like a delivery fault rather than a permission fault. Always request the permission, then test on an Android 13 or later device.
With Capacitor
The @capacitor/push-notifications plugin handles both platforms with one call. Check the current permission first, request it only when needed, then register.
import { PushNotifications } from '@capacitor/push-notifications';

async function registerForPush() {
    let status = await PushNotifications.checkPermissions();

    if (status.receive === 'prompt') {
        status = await PushNotifications.requestPermissions();
    }

    if (status.receive !== 'granted') {
        // The user declined. Do not register.
        return;
    }

    // This triggers the 'registration' listener with the native device token.
    await PushNotifications.register();
}
With Cordova
On iOS, the push plugin shows the permission prompt when you call init() with the alert, badge, or sound options set.
On Android 13 and later, request POST_NOTIFICATIONS yourself. Your push plugin may not do this for you, so check the documentation for the plugin version that you use. If it does not, use a permissions plugin such as cordova-plugin-android-permissions:
function ensureAndroidNotificationPermission(onComplete) {
    // Only Android 13 (API 33) and later need this permission.
    if (!cordova.plugins || !cordova.plugins.permissions) {
        onComplete();
        return;
    }

    var permissions = cordova.plugins.permissions;
    var permission = permissions.POST_NOTIFICATIONS;

    permissions.checkPermission(permission, function (status) {
        if (status.hasPermission) {
            onComplete();
        } else {
            permissions.requestPermission(permission, onComplete, onComplete);
        }
    }, onComplete);
}
Get a native device token and register it
Only users that have both an email address and a push token are created in Dotdigital MarketingRead the Register your app users for push page to understand the requirements for syncing your app users with Dotdigital Marketing. Dotdigital Marketing syncs only the users who have both an email address and a push token. Only these users can receive push messages.
Many frameworks can get the native push tokens that Dotdigital Marketing needs. These include React Native, Cordova with the PhoneGap push plugin, and Ionic Capacitor.
This tutorial uses the Cordova framework with the PhoneGap plugin. Any framework that you choose must be able to get a native device token, which this SDK calls the registrationId.
Before you start:
- For iOS, you need your app ID's bundle ID. This must match the value of the
idattribute in the<widget>element of yourconfig.xmlfile. - For Android, you need the package name that you entered in your push notification profile.
Make sure your bundle ID and package name are correctYour bundle ID for iOS and your package name for Google FCM must match the values configured in the respective developer portal, and in your push notification profile.
Why you must store the token
The SDK needs an active session before it can register a push token. Both setAPNSPushDetails() and setFCMPushDetails() call ensureSession() internally, so they fail if no session exists.
Your push plugin gets the token asynchronously, and it can deliver the token before the SDK has a session. This creates a race condition between two events that you do not control.
To avoid the race, split the two tasks:
- When your push plugin delivers a token, store it, then try to register it.
- Each time your app starts and the SDK has a session, try to register the stored token again.
The examples below store the token in localStorage for this reason.
Push tokens change, so register on every token eventDo not treat the token as a value that you collect once. FCM tokens rotate, and APNS tokens change when the user restores a backup or reinstalls your app. Your plugin fires its registration event again each time this happens.
Register the token on every registration event, not only the first. Also register the stored token again after the SDK starts a new session, because the SDK links the token to the current session.
Choose the correct APNS environment
The SDK sends the APNS environment with the token. You must pass the value that matches your app build type, or APNS does not deliver your push messages.
| Build type | Environment parameter |
|---|---|
| Development builds | Environment.development |
| Ad hoc builds | Environment.production |
| TestFlight builds | Environment.production |
| App Store builds | Environment.production |
Set the environment from your build configurationDo not hard code
Environment.development. A development token is not valid in the production environment, and APNS returns no error when the environments do not match. Your App Store users then receive no push messages. Read the value from your build configuration instead.
Format of the APNS token
Ensure your APNS token is formatted correctlyThe SDK expects the APNS push token as a 64 character hexadecimal string. Most framework push plugins do this for you. A correct token looks like this:
02df25c845d460bcdad7802d2af6fc1dfce97283bf75cc993eb6dca835ea2e2fIf your token does not look like the example, it is likely that the raw bytes returned by iOS were cast straight to a string instead of to a hexadecimal string.
Get a registration ID with Cordova and the PhoneGap plugin
Dotdigital Marketing can send push notifications only after you pass the registrationId to the JavaScript SDK.
Getting the registrationId is an asynchronous task that runs after the Cordova deviceready event. In the example below, an event handler stores the native push token when the push plugin receives one, then registers it with the JavaScript SDK.
Set the registrationId at both of these times, where possible:
- When the
platform.readyevent fires, which happens each time the app opens. - Whenever your push library fires an event to say that it has acquired a
registrationId.
The JavaScript SDK uses a different method for each operating system. Use the Cordova device plugin to find out which platform the user is on.
import { Environment } from "@comapi/sdk-js-foundation";
import { Push } from 'ionic-native';

const NATIVE_PUSH_TOKEN = "app.nativePushToken";

// Set the APNS environment from your build configuration, not by hand.
const APNS_ENVIRONMENT = isProductionBuild ? Environment.production : Environment.development;

// Platform ready event handler
platform.ready().then(() => {
    // Initialise the Ionic push plugin, or the equivalent for your framework.
    let push = Push.init({
        // For Android apps
        android: { senderID: 'Your_Project_ID' },
        // For iOS apps
        ios: {
            alert: "true",
            badge: true,
            sound: 'false'
        }
    });

    // Handle the native push tokens that arrive asynchronously.
    push.on('registration', (data) => {
        console.log("Got a native push token: ", data.registrationId);

        // Store the native token, so that you can reuse it at each launch.
        localStorage.setItem(NATIVE_PUSH_TOKEN, data.registrationId);

        // Register the push token with the SDK.
        registerNativeToken();
    });

    // Error handling for the push plugin
    push.on('error', (error) => {
        console.error('Error with Push plugin', error);
    });

    // Your own push notification handling, if you need it.
    push.on('notification', (data) => {
        console.log("got a push notification", data);
    });

    // Try to register a native push token.
    registerNativeToken();
});

function registerNativeToken() {
    // Retrieve the stored native push token.
    let registrationId = localStorage.getItem(NATIVE_PUSH_TOKEN);

    // Skip if the registrationId has not arrived yet.
    if (!registrationId) {
        console.log("No native push token available yet");
        return;
    }

    // Call a different method for each operating system.
    if (platform.is('ios')) {
        // The bundle ID must match the value in your push notification profile
        // in Dotdigital Marketing, and the environment must match your build type.
        sdk.device.setAPNSPushDetails("<Bundle Id>", APNS_ENVIRONMENT, registrationId)
            .then(result => {
                console.log("setAPNSPushDetails() succeeded", result);
            })
            .catch(error => {
                console.error("setAPNSPushDetails() failed", error);
            });

    } else if (platform.is('android')) {
        // The package name must match the value in your push notification profile
        // in Dotdigital Marketing.
        sdk.device.setFCMPushDetails("<Package Name>", registrationId)
            .then(result => {
                console.log("setFCMPushDetails() succeeded", result);
            })
            .catch(error => {
                console.error("setFCMPushDetails() failed", error);
            });
    }
}
const NATIVE_PUSH_TOKEN = "app.nativePushToken";
// Set the APNS environment from your build configuration, not by hand.
var APNS_ENVIRONMENT = isProductionBuild ? COMAPI.Environment.production : COMAPI.Environment.development;
// Platform ready event handler
platform.ready().then(function () {
// Initialise the push plugin, or the equivalent for your framework.
var push = PushNotification.init({
// For Android apps
android: { senderID: 'Your_Project_ID' },
// For iOS apps
ios: {
alert: "true",
badge: true,
sound: 'false'
}
});
// Handle the native push tokens that arrive asynchronously.
push.on('registration', function (data) {
console.log("Got a native push token: ", data.registrationId);
// Store the native token, so that you can reuse it at each launch.
localStorage.setItem(NATIVE_PUSH_TOKEN, data.registrationId);
// Register the push token with the SDK.
registerNativeToken();
});
// Error handling for the push plugin
push.on('error', function (error) {
console.error('Error with Push plugin', error);
});
// Your own push notification handling, if you need it.
push.on('notification', function (data) {
console.log("got a push notification", data);
});
// Try to register a native push token.
registerNativeToken();
});
function registerNativeToken() {
// Retrieve the stored native push token.
var registrationId = localStorage.getItem(NATIVE_PUSH_TOKEN);
// Skip if the registrationId has not arrived yet.
if (!registrationId) {
console.log("No native push token available yet");
return;
}
// Call a different method for each operating system.
if (platform.is('ios')) {
sdk.device.setAPNSPushDetails("<Bundle Id>", APNS_ENVIRONMENT, registrationId)
.then(function (result) {
console.log("setAPNSPushDetails() succeeded", result);
})
.catch(function (error) {
console.error("setAPNSPushDetails() failed", error);
});
} else if (platform.is('android')) {
sdk.device.setFCMPushDetails("<Package Name>", registrationId)
.then(function (result) {
console.log("setFCMPushDetails() succeeded", result);
})
.catch(function (error) {
console.error("setFCMPushDetails() failed", error);
});
}
}
Removing a push tokenTo stop a device receiving push messages without ending the session, call
sdk.device.removePushDetails().
Get a registration ID with Capacitor
Capacitor is the supported successor to Cordova in the Ionic ecosystem. The @capacitor/push-notifications plugin delivers the native token in the registration listener.
import { PushNotifications } from '@capacitor/push-notifications';
import { Capacitor } from '@capacitor/core';
import { Environment } from '@comapi/sdk-js-foundation';

const NATIVE_PUSH_TOKEN = 'app.nativePushToken';

// Set the APNS environment from your build configuration, not by hand.
const APNS_ENVIRONMENT = isProductionBuild ? Environment.production : Environment.development;

// token.value is the native APNS or FCM token, already formatted correctly.
PushNotifications.addListener('registration', (token) => {
    localStorage.setItem(NATIVE_PUSH_TOKEN, token.value);
    registerNativeToken();
});

PushNotifications.addListener('registrationError', (error) => {
    console.error('Push registration failed', error);
});

async function registerNativeToken() {
    const registrationId = localStorage.getItem(NATIVE_PUSH_TOKEN);
    if (!registrationId) {
        return;
    }

    try {
        if (Capacitor.getPlatform() === 'ios') {
            await sdk.device.setAPNSPushDetails('<Bundle Id>', APNS_ENVIRONMENT, registrationId);
        } else if (Capacitor.getPlatform() === 'android') {
            await sdk.device.setFCMPushDetails('<Package Name>', registrationId);
        }
    } catch (error) {
        console.error('Failed to register push token with the SDK', error);
    }
}
Capacitor delivers your custom payload keys under the data property of the notification. The SDK looks for dd_deepLink there, so pass the whole notification object to handlePushAndGetMessageDetails():
PushNotifications.addListener('pushNotificationActionPerformed', (action) => {
    // Pass the whole notification, not action.notification.data.
    sdk.handlePushAndGetMessageDetails(action.notification)
        .then((details) => {
            if (details.ddOriginated && details.url) {
                // Report done. Your app must open the link itself.
            }
        })
        .catch((error) => console.error(error));
});
Get a registration ID with React Native and Expo
React Native apps usually get the token from a Firebase messaging library. Expo apps use expo-notifications.
Expo apps must send the native token, not the Expo push token
expo-notificationscan return two different tokens:
getExpoPushTokenAsync()returns an Expo push token, which looks likeExponentPushToken[xxxxxxx]. This token works only with Expo's own push service. Do not send it to Dotdigital Marketing.getDevicePushTokenAsync()returns the native APNS or FCM token. Send this token.The SDK accepts any string, so it stores an Expo push token without complaint. The device then never receives a push message, and nothing reports an error.
To check which token you have, compare it against the format in Format of the APNS token.
import * as Notifications from 'expo-notifications';
import { Platform } from 'react-native';
import { Environment } from '@comapi/sdk-js-foundation';

const APNS_ENVIRONMENT = isProductionBuild ? Environment.production : Environment.development;

async function registerNativeToken() {
    const { status } = await Notifications.requestPermissionsAsync();
    if (status !== 'granted') {
        return;
    }

    // getDevicePushTokenAsync returns the native token. Do not use
    // getExpoPushTokenAsync here.
    const devicePushToken = await Notifications.getDevicePushTokenAsync();
    const registrationId = devicePushToken.data;

    try {
        if (Platform.OS === 'ios') {
            await sdk.device.setAPNSPushDetails('<Bundle Id>', APNS_ENVIRONMENT, registrationId);
        } else if (Platform.OS === 'android') {
            await sdk.device.setFCMPushDetails('<Package Name>', registrationId);
        }
    } catch (error) {
        console.error('Failed to register push token with the SDK', error);
    }
}
React Native Firebase delivers the payload under remoteMessage.data, which is one of the locations that the SDK checks. Pass the whole remoteMessage object to handlePushAndGetMessageDetails().
Create an Android notification channel
Android 8 and later requires a notification channel. Android does not display a notification that has no channel.
Your framework's push plugin creates the channel, so create it once when your app starts, before you register for push.
With Capacitor:
import { PushNotifications } from '@capacitor/push-notifications';
import { Capacitor } from '@capacitor/core';

async function createDefaultChannel() {
    if (Capacitor.getPlatform() !== 'android') {
        return;
    }

    await PushNotifications.createChannel({
        id: 'default',
        name: 'Default',
        description: 'Default push notifications',
        importance: 4,
        visibility: 1
    });
}
With Cordova, use the createChannel method of your push plugin. Check the documentation for the plugin version that you use, because the options differ between plugins.
Match the channel ID to your push messageIf you send a channel ID in your push payload, it must match a channel that your app has created. If the channel does not exist, Android does not display the notification.
JavaScript SDK sample code in TypeScript
// some app specific imports
import { AppSettings } from "../settings";
import { AuthService } from "./auth";

// Comapi class and interface imports
import { Foundation, ComapiConfig, IAuthChallengeOptions } from "@comapi/sdk-js-foundation"

export class ComapiService {

    public sdk: Foundation;

    private challengeHandler(options: IAuthChallengeOptions, answerAuthenticationChallenge) {
        this._authService.getToken(options.nonce)
            .then((token) => {
                answerAuthenticationChallenge(token);
            });
    }

    constructor(private _authService: AuthService) { }

    /**
     * Public method that encapsulates the initialisation of Comapi
     */
    public initialise(): Promise<Foundation> {

        return new Promise((resolve, reject) => {

            if (this._authService.isAuthenticated()) {

                let comapiConfig = new ComapiConfig()
                    .withApiSpace(AppSettings.APP_SPACE_ID)
                    // Bind this pointer, so that the authChallenge callback can
                    // access this._authService.
                    .withAuthChallenge(this.challengeHandler.bind(this));

                Foundation.initialise(comapiConfig)
                    .then((sdk) => {
                        this.sdk = sdk;
                        console.log("foundation interface created");
                        resolve(sdk);
                    })
                    .catch((error) => {
                        console.error("initialise failed", error);
                        reject(error);
                    });
            } else {
                reject("Not logged in");
            }
        });
    }
}
Handling push notifications
Reporting the push tap for analytics
Pass every received push message to handlePushAndGetMessageDetails(). Dotdigital Marketing produces push reporting from this call.
The method returns a Promise that resolves to an object with two fields:
url. Any deep link or URL in the message. This isundefinedwhen the message contains no deep link.ddOriginated. A Boolean that istruewhen Dotdigital Marketing sent the message.
push.on('notification', (data) => {
    sdk.handlePushAndGetMessageDetails(data)
        .then((details) => {
            if (!details.ddOriginated) {
                // Another system sent this message. Handle it your own way.
                return;
            }
            if (details.url) {
                // The tap is now reported. Your app must open the link itself.
                console.log("Deep link: ", details.url);
            }
        })
        .catch((error) => {
            console.error("Failed to handle push message", error);
        });
});
This method reports the tap, but it does not open the linkThis is a difference from the native SDKs. On Android and iOS, the SDK opens the deep link for you. In JavaScript,
handlePushAndGetMessageDetails()calls the tracking URL and returns the link to you. Your app must then open the link. See Deep link support and link tracking.
Reporting only happens when the message contains a deep linkThe SDK calls the tracking URL only when the payload contains a
dd_deepLinkobject with atrackingUrlvalue. Dotdigital Marketing adds one only for the deep link and survey tap actions, so a message that sends custom data only records no tap, even when you call this method.If you need click reporting for a push message, include a deep link in that message. See Send a deep link or custom data with a push message.
Detecting push messages from Dotdigital Marketing
Your app can receive push messages from more than one provider or system. Read the ddOriginated field from handlePushAndGetMessageDetails() to detect whether Dotdigital Marketing sent a message. This field is true if Dotdigital Marketing sent the message, and false if another system sent it.
The SDK reads this value from the dd_originated key at the top level of the push payload.
Where the SDK looks for the deep link
Push plugins wrap the payload in different ways. The SDK checks three locations for the dd_deepLink value, in this order:
dd_deepLinkat the top level of the payload.data.dd_deepLink.additionalData.dd_deepLink.
The SDK also accepts dd_deepLink as an object, or as a JSON string that it parses for you. If the string is malformed, the returned Promise rejects.
Why the value can be a JSON stringAn FCM data payload can hold only text values, so Dotdigital Marketing converts the
dd_deepLinkanddd_dataobjects to JSON strings before it sends them to Android devices. The SDK accepts both forms for this reason. If you read the payload yourself instead of using the SDK, parse the string before you use it.
Pass the whole message object to the SDKPass the complete message object that your push plugin gives you. Do not pass a sub-object of it. If you pass only part of the message, the SDK may not find the
dd_deepLinkordd_originatedvalues, and your reporting is then incomplete.
Handling custom data payloads
Dotdigital Marketing delivers custom JSON data with a push message, and your app decides what to do with it. Use this to build advanced push handling while you still send the message through Dotdigital Marketing.
The custom data arrives in the dd_data value of the push payload. Read it from the message object that your push plugin gives you. Like the deep link, your push plugin may place it at the top level, under data, or under additionalData, so check the shape of the payload that your framework delivers.
Your app is responsible for validating this data. Treat every value as untrusted input, and check that each key exists and has the type you expect before you use it.
To find out how to send custom data, and what you can put in it, see Send a deep link or custom data with a push message.
Displaying push notifications while the app is in the foreground
The operating system displays push notifications automatically only while the app is in the background. These notifications go to the system tray on Android, or to the Notification Center on iOS, and they start your app when the user taps them.
To display a push notification while the app is in the foreground, use the option that applies to your platform.
Android
On Android, you can let the push plugin display notifications automatically, or you can display them yourself.
To display notifications automatically, set the forceShow property of the android object to true in the init() method of the push plugin. The default value is false.
With forceShow set to true, the on('notification') callback runs only when the user taps the notification. You then decide what happens on the tap. The push notification is passed as an argument to the callback.
import { Push } from 'ionic-native';

let push = Push.init({
    // For Android apps
    android: {
        senderID: 'Your_Project_ID',
        forceShow: true
    }
});
const push = PushNotification.init({
// For Android apps
android: {
senderID: 'Your_Project_ID',
forceShow: true
}
});To display notifications yourself, leave forceShow set to false. The on('notification') callback then runs as soon as the message arrives, and the push notification is passed as an argument to it. You then build your own display.
iOS
On iOS, you must build your own display. The push notification is passed as an argument to the push.on('notification') callback.
Silent and background data pushes
A silent push delivers custom JSON data to your app without notifying the user. Use it to start an action in your app in the background.
Silent push support depends on your framework's push plugin, not on the JavaScript SDK. The SDK reads the payload that your plugin gives it, so your plugin must first wake your app and deliver the message.
What Dotdigital Marketing sends
The payload differs by platform, and neither form displays a notification:
| Platform | What Dotdigital Marketing sends |
|---|---|
| Android, through FCM | Your data values, with no notification object. FCM therefore displays nothing, and your plugin must hand the message to your code. |
| iOS, through APNS | Your custom payload, plus content-available set to 1 in the aps dictionary. The push type is background and the priority is 5. |
Dotdigital Marketing also omits the title and the message from a silent push, so put everything that your app needs into the data payload.
Setting up your app
To use silent pushes:
- On iOS, enable the Remote notifications background mode in your native project. In Xcode, select your app target, go to Signing & Capabilities, add Background Modes, then select Remote notifications.
- Check your plugin's background handler. Cordova and Capacitor plugins expose background data messages in different ways, and some plugins do not deliver them at all while the app is closed. Check the documentation for the plugin version that you use.
- Read your custom data from the
dd_datavalue of the payload, as described in Handling custom data payloads.
The operating system does not guarantee silent push deliveryiOS treats silent pushes as low priority. The system may delay them, or it may not deliver them, depending on battery level, network conditions, and how often the user opens your app. Android applies similar restrictions when the device is in Doze mode.
Do not rely on a silent push for anything critical.
To find out how to send a silent push, see Send a silent push message.
Deep link support and link tracking
You can send a deep link with a push message. Your app is responsible for two things: reporting the tap, and opening the link.
Always report the tapCall
handlePushAndGetMessageDetails()whenever the user taps a push message. If you do not, the push reporting in Dotdigital Marketing does not show the tap. See Reporting the push tap for analytics.
Your app must support any deep link that you send in a push message. You can also send a link for another app, for example a link that opens a social media app.
A push message can carry a custom scheme such as myappscheme://product/123, or a web address such as https://example.com/product/123. To choose what a message sends, see Send a deep link or custom data with a push message.
Cordova based apps
To open a deep link in a Cordova based app, install the cordova-plugin-dotdigital-pushutils plugin:
cordova plugin add @comapi/cordova-plugin-dotdigital-pushutilsThis plugin retrieves the link from the push notification, then asks the device to open it from native code. The link can be a deep link into your app, or a normal URL that points to a web page.
Implement the push.on event handler, which runs each time your app receives a push notification:
push.on('notification', (data) => {
    // Is there a deep link to process?
    if (cordova && cordova.plugins && cordova.plugins.dotdigitalPlugin) {
        // You do not need to call containsLink. It is safe to call handleLink for
        // all notifications. containsLink is available if you want to apply your
        // own logic first.

        if (cordova.plugins.dotdigitalPlugin.containsLink(data)) {
            cordova.plugins.dotdigitalPlugin.handleLink(data)
                .then(() => {
                    console.log("Deep link handled");
                })
                .catch((error) => {
                    console.log("Issue handling deep link", error);
                });
        }
    }
});
Register a URL scheme in your app
To open a deep link in your own app, you need a plugin that manages custom URL schemes. We recommend cordova-plugin-customurlscheme, because it is simple to set up. Other options include:
You may prefer a plugin that is designed for your framework.
Add the plugin, then specify the scheme that your app listens to. The scheme can be any short alphanumeric value that does not clash with an existing scheme:
cordova plugin add cordova-plugin-customurlscheme --variable URL_SCHEME=yourUrlSchemeThis sets a deep link for the yourUrlScheme:// scheme.
Add this function to your app to interpret the deep links:
function handleOpenURL(url) {
    setTimeout(function() {
      console.log(`handleOpenUrl(${url})`);
      // Route to the correct screen in your app.
    }, 0);
}
To handle deep links correctly, you must also change the native project files.
iOS
Add the LSApplicationQueriesSchemes key to your info.plist file, so that your app can open deep links.
Then register your URL scheme in Xcode:
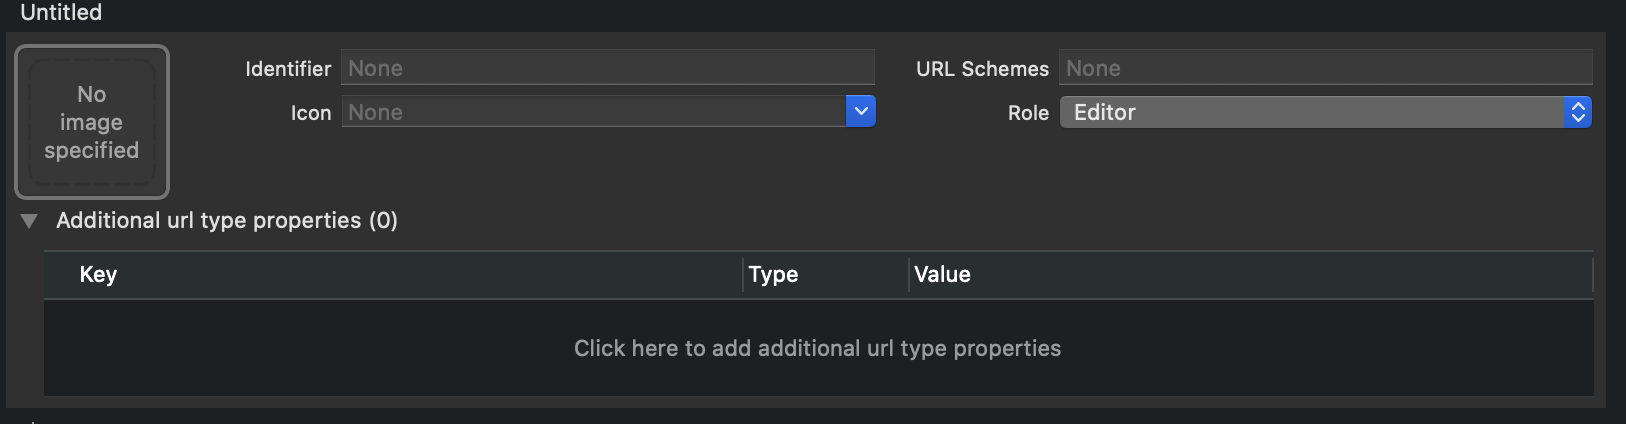
- In your app's project in Xcode, go to the Info tab. Under URL Types, select the + button.
- In the Identifier field, enter your app's bundle identifier, for example
com.example.yourApp. - In the URL Schemes field, enter your deep link scheme.
Android
Change the AndroidManifest.xml file for your app:
- Set
android:launchModetosingleTask. - Add an intent filter for your deep link scheme:
<intent-filter>
  <data android:scheme="yourUrlScheme"/>
  <action android:name="android.intent.action.VIEW" />
  <category android:name="android.intent.category.DEFAULT" />
  <category android:name="android.intent.category.BROWSABLE" />
</intent-filter>
You can add the following configuration to the config.xml file of your Cordova project instead. Cordova then creates the intent filter for you:
<platform name="android">
   <allow-intent href="yourUrlScheme:*" />
</platform>
For platform guidance on deep links, see Android App Links and Apple's Defining a custom URL scheme for your app.
Next stepsMake sure that your app passes an email address to the SDK for the app user. Dotdigital Marketing then creates a contact for that user. To do this, follow these instructions.
When your app can receive push messages, decide what each message does. See Send a deep link or custom data with a push message.
Updated 27 days ago