
Register your app users for push
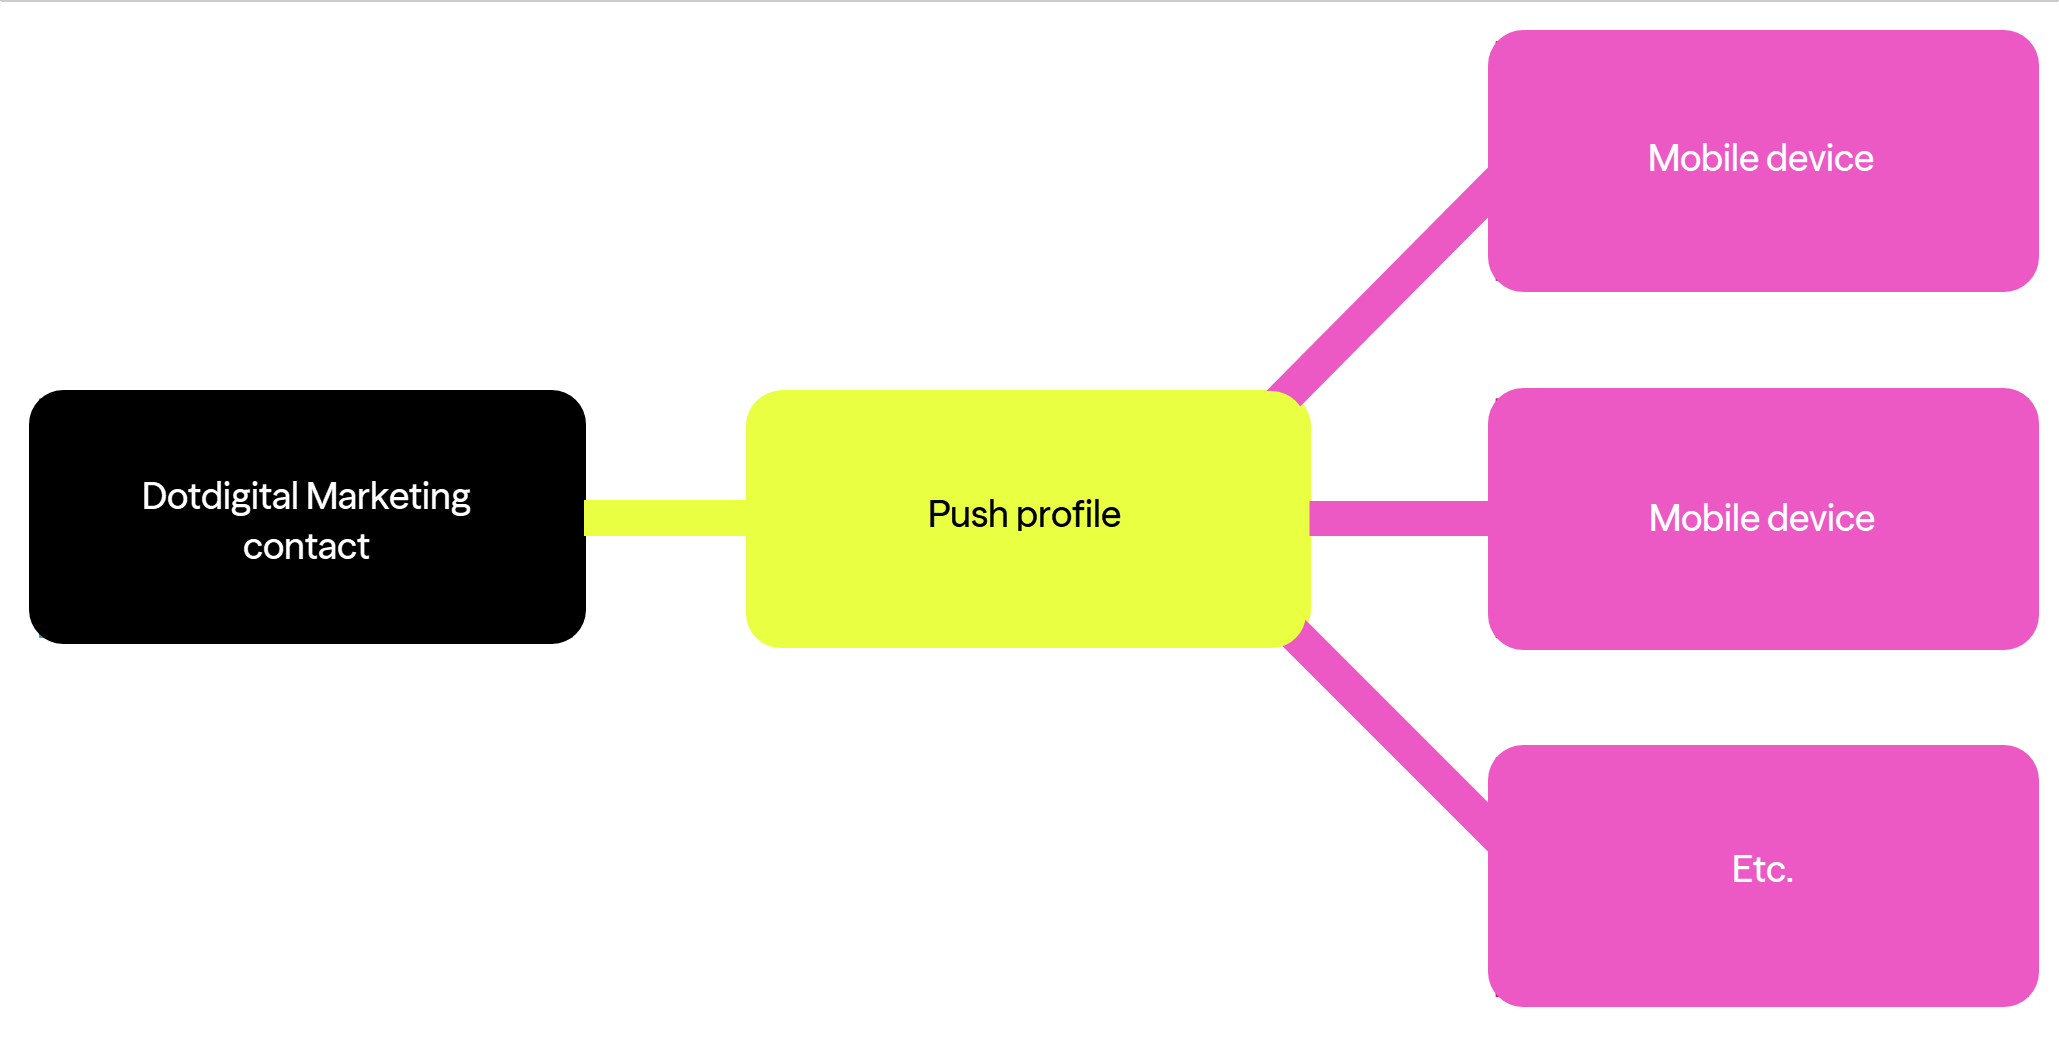
Dotdigital Marketing can send push notifications, but only to users who have a push profile linked to them.
To link a Dotdigital Marketing contact to a push profile, set an email address on the push profile. Dotdigital Marketing then does one of two things. If a contact already exists with that email address, Dotdigital Marketing links the push profile to it. If no contact exists, Dotdigital Marketing creates a contact with that email address, then links the push profile to it automatically.
Ask users to enter their email addressIf you do not have an email address for your app user, ask the user whether they want to receive push notifications from you, then prompt them to enter their email address.
Prerequisite knowledge
The following concepts are useful to understand when you work with the SDK.
Your push audience is discovered
You cannot import data to make a contact push contactable. This makes push different from email and SMS.
Dotdigital Marketing discovers your push audience when your users open your app. The App Messaging SDK in your app sends the push tokens and the email address to Dotdigital Marketing.
When a contact is push contactable, the PUSHOPTIN_xxx data field has a value. If the contact is not push contactable, this field is empty.
A push profile needs both a push token and an email addressDotdigital Marketing syncs a push profile and shows it as a contact only when the profile has at least one registered device push token and an email address. If either is missing, the profile does not appear as a contact.
Do not edit or amend the PUSHOPTIN fieldDotdigital Marketing manages the PUSHOPTIN_xxx data field automatically. Do not change this field, and do not put a value in it manually. This causes problems with push messaging.
Push profiles
The SDK uses a profile to represent the app user. The SDK creates the profile after it initialises and starts a session. At this point, the SDK asks your app for the JWT that represents the app user, as described on the Create a JWT page.
The SDK uses the sub claim from the JWT as the push profile ID. For more information, see the role of the sub claim.
Sessions
The SDK requires an active session to send push messages to a device. If no session exists, you must start one.
Sessions persist between app launches. You therefore need to start a session only once, or when no session exists.
When the SDK starts a session, it uses the JWT to create the user's profile ID, which is a profileId string. This profile ID stays the same until you stop the session.
When you stop a session and start it again, the SDK requests a new JWT and uses it to create a profile. We recommend that your JWT always uses the same value in the sub claim for the same user. This stops duplicate profiles.
Does your app support switching users?Stop the session whenever a user logs out of your app. This stops the same push profile being attached to more than one contact in Dotdigital Marketing. When a new user logs in, the SDK then creates a session with a push profile for that new user.
What happens when a user uninstalls your app
Dotdigital Marketing does not receive a notification when a user uninstalls your app or clears the app data. The push token that we store expires in time.
When we try to send a push message with an expired token, the failure prompts the system to clear the token from the device and the contact. Until a send attempt checks the token, we have no way to know whether it is still valid.
If a user uninstalls your app, that device receives no more push messages. If a user only clears the app data, the device continues to receive messages until the push token expires.
To remove a push token before it expires, end the session:
client.service().session().endSession(
    new Callback<ComapiResult<Void>>() { /* implement */ });
client.service().session().endSession(
object : Callback<ComapiResult<Void>> { /* implement */ })[client.services.session endSessionWithCompletion:^(CMPResult<NSNumber *> *result) {
// Handle the result.
}];client.services.session.endSession(completion: { result in
// Handle the result.
})sdk.endSession()
.then(function (success) {
// Session ended.
})
.catch(function (error) {
console.error("endSession() failed", error);
});
Removing a push token without ending the sessionIn the JavaScript SDK, you can call
sdk.device.removePushDetails()to remove the push token but keep the session. This is useful when a user opts out of push notifications but stays signed in to your app.
Update the profile with the email address
- After you initialise the SDK, check whether a session has started. You must do this before you update the profile with an email address.
if (client.getSession() != null && client.getSession().isSuccessfullyCreated()) {
    // A session exists. Continue to step 2.
}
if (client.session?.isSuccessfullyCreated == true) {
// A session exists. Continue to step 2.
}BOOL isSuccessfullyCreated = [client isSessionSuccessfullyCreated];let isSuccessfullyCreated = client.isSessionSuccessfullyCreatedIf a session has started, go to step 2. If no session has started, call the startSession() method first, then go to step 2.
client.service().session().startSession(new Callback<Session>() { /* implement */ });client.service().session().startSession(object : Callback<Session> { /* implement */ })[client.services.session startSessionWithCompletion:^{
// Session created successfully.
} failure:^(NSError * _Nullable error) {
// An error occurred.
}];client.services.session.startSession(completion: {
// Session created successfully.
}, failure: { error in
// An error occurred.
})sdk.startSession()
.then(function (session) {
// Session created successfully. session.profileId holds the profile ID.
})
.catch(function (error) {
console.error("startSession() failed", error);
});- Retrieve the profile. On Android and iOS, use the
getProfileId()method on theSessionobject to get the app user's profile ID, then pass that profile ID to thegetProfile()method. In JavaScript, callgetMyProfile(), which resolves the current user for you.
On Android, the getProfile() method returns a ComapiResult<T> object with the following methods:
result.isSuccessful(): whether the profile was retrievedresult.getResult(): the profile dataresult.getETag(): the version of the dataresult.getMessage(): the HTTP status messageresult.getErrorBody(): the error detailsresult.getCode(): the HTTP status code
if (client.getSession() != null && client.getSession().isSuccessfullyCreated()) {
    client.service().profile().getProfile(
        client.getSession().getProfileId(),
        new Callback<ComapiResult<Map<String, Object>>>() {
            @Override
            public void success(ComapiResult<Map<String, Object>> result) {
                // Use result.getResult() for the profile data, and
                // result.getETag() when you patch the profile in step 3.
            }

            @Override
            public void error(Throwable t) {
                // An error occurred.
            }
        });
}
val session = client.session
if (session?.isSuccessfullyCreated == true) {
client.service().profile().getProfile(
session.profileId,
object : Callback<ComapiResult<Map<String, Any>>> {
override fun success(result: ComapiResult<Map<String, Any>>) {
// Use result.result for the profile data, and result.eTag
// when you patch the profile in step 3.
}
override fun error(t: Throwable) {
// An error occurred.
}
})
}[client.services.profile getProfileWithProfileID:@"<PROFILE-ID>" completion:^(CMPResult<CMPProfile *> *result) {
if (result.error) {
// An error occurred.
} else {
// Use result.object for the profile data, and result.eTag when you
// patch the profile in step 3.
}
}];client.services.profile.getProfile(profileID: "<PROFILE-ID>", completion: { result in
if let error = result.error {
// An error occurred.
print(error)
} else {
// Use result.object for the profile data, and result.eTag when you
// patch the profile in step 3.
}
})sdk.services.profile.getMyProfile()
.then(function (profile) {
// Use the profile.
})
.catch(function (error) {
console.error("getMyProfile() failed", error);
});- Add an email address to the profile data, then patch the profile.
eTagsAn eTag string holds information about the version of a resource. Every service response returns one.
When you update a profile, the eTag checks that nothing else has updated the profile since you retrieved it.
On Android and iOS, pass the eTag from the
getProfile()result into the patch method.In JavaScript, the
patchMyProfile()method takes a boolean rather than an eTag string. Passtrueto make the SDK fetch and apply the current eTag for you.
Map<String, Object> additionalMap = new HashMap<>();
// Add the user's email address to the profile.
additionalMap.put("email", "[email protected]");

client.service().profile().patchMyProfile(
    additionalMap,
    result.getETag(),
    new Callback<ComapiResult<Map<String, Object>>>() {
        @Override
        public void success(ComapiResult<Map<String, Object>> patchResult) {
            // The profile now holds the email address.
        }

        @Override
        public void error(Throwable t) {
            // An error occurred.
        }
    });
val additionalMap = mapOf<String, Any>(
// Add the user's email address to the profile.
"email" to "[email protected]"
)
client.service().profile().patchMyProfile(
additionalMap,
result.eTag,
object : Callback<ComapiResult<Map<String, Any>>> {
override fun success(patchResult: ComapiResult<Map<String, Any>>) {
// The profile now holds the email address.
}
override fun error(t: Throwable) {
// An error occurred.
}
})[client.services.profile patchProfileWithProfileID:@"<PROFILE-ID>"
attributes:@{@"email" : @"[email protected]"}
eTag:result.eTag
completion:^(CMPResult<CMPProfile *> *patchResult) {
if (patchResult.error) {
// An error occurred.
} else {
// The profile now holds the email address.
}
}];client.services.profile.patchProfile(profileID: "<PROFILE-ID>",
attributes: ["email": "[email protected]"],
eTag: result.eTag,
completion: { patchResult in
if let error = patchResult.error {
// An error occurred.
print(error)
} else {
// The profile now holds the email address.
}
})// Pass true so that the SDK fetches and applies the current eTag for you.
sdk.services.profile.patchMyProfile({ email: "[email protected]" }, true)
.then(function (profile) {
// The profile now holds the email address.
})
.catch(function (error) {
console.error("patchMyProfile() failed", error);
});
A push profile needs at least one valid device to use pushThe push profile must have at least one registered device with an FCM or APNS token before Dotdigital Marketing associates it with a contact. Without a device, the contact's PUSHOPTIN_xxx field stays empty and the contact cannot use the push channel.
All doneWhen a user launches your app, the SDK sends the user's profile data to Dotdigital Marketing. If that profile contains an email address, the matching contact can now receive push notifications.
Checking a contact's device data
To check that you have integrated the SDK correctly and passed your user registration information correctly, use the Devices tab of a contact in Dotdigital Marketing:
- Log in to Dotdigital Marketing.
- Go to Audience > Contacts.
- Search for the contact with the email address that you registered for them.
- Select the contact.
- Select the Devices tab.
A contact can have more than one registered device. When you push to a contact, Dotdigital Marketing sends the message to every device that has a valid push token.
The push token appears in the device details on the right, in the Registration ID field. If this field is empty, either the user has not allowed push permissions, or your app has not registered the push token correctly with the SDK. Check your app code.
Common issues
No device details showing for a contact
Check that you have registered an email address with the SDK, as described in Update the profile with the email address. Dotdigital Marketing uses this email address to link an instance of your app on a device to a contact.
I have devices but I am not receiving pushes
Dotdigital Marketing needs both of the following before it can send a push message to a contact:
- The contact has one or more registered devices. Check the Devices tab, as described above.
- At least one device has a valid push token. The token appears in the Registration ID field on the Devices tab.
If the Registration ID field is empty, check the following:
- The user has not allowed push permissions. On Android 13 and later, the user must grant the
POST_NOTIFICATIONSpermission. On iOS, the user must accept the notification permission prompt. - Your app is not registering the push token correctly with the SDK. Check your app code:
- The push profile has incorrect APNS or FCM details. If you see no push tokens registered but you believe your app code is correct, check your settings again.
Still having issues?See the Push troubleshooting guide for more help.
Unregistering app users
To let users opt out of push notifications, end their push session in the SDK. This deletes any push tokens from Dotdigital Marketing and clears the PUSHOPTIN_xxx data field, which shows that the user is no longer push contactable.
To end a session:
client.service().session().endSession(
    new Callback<ComapiResult<Void>>() { /* implement */ });
client.service().session().endSession(
object : Callback<ComapiResult<Void>> { /* implement */ })rxClient.service().session().endSession()
.subscribe(new Observer<ComapiResult<Void>>() { /* implement */ });[client.services.session endSessionWithCompletion:^(CMPResult<NSNumber *> *result) {
if (result.error) {
// An error occurred.
} else if ([result.object boolValue]) {
// Session ended successfully.
}
}];client.services.session.endSession(completion: { result in
if let error = result.error {
// An error occurred.
print(error)
} else if result.object?.boolValue == true {
// Session ended successfully.
}
})sdk.endSession()
.then(function (success) {
// Session ended.
})
.catch(function (error) {
console.error("endSession() failed", error);
});
Keeping the user signed inEnding the session removes the push token and signs the user out of the SDK. In the JavaScript SDK, call
sdk.device.removePushDetails()instead if you want to remove the push token but keep the session active.
Checking for push permission changes
A user can revoke your app's push permissions in the operating system settings. Check for this, then end their session so that Dotdigital Marketing reflects the change. To do this:
- When your app launches, ask the operating system whether push permissions are granted.
- If permissions are not granted, either end the session to remove the push registration, or prompt the user to grant the permission again.
- If you prompt the user and they grant the permission, start a session with the SDK. This makes sure that the SDK acquires a push token and sends it to Dotdigital Marketing.
client.service().session().startSession(new Callback<Session>() { /* implement */ });client.service().session().startSession(object : Callback<Session> { /* implement */ })rxClient.service().session().startSession()
.subscribe(new Observer<Session>() { /* implement */ });[client.services.session startSessionWithCompletion:^{
// Session created successfully.
} failure:^(NSError * _Nullable error) {
// An error occurred.
}];client.services.session.startSession(completion: {
// Session created successfully.
}, failure: { error in
// An error occurred.
})sdk.startSession()
.then(function (session) {
// Session created successfully.
})
.catch(function (error) {
console.error("startSession() failed", error);
});Updated 28 days ago